.jpg)
Wednesday, September 21, 2022
Happy Birthday with Cycling Freinds Card by Amanda Wilcox
.jpg)
Thursday, September 1, 2022
Grateful Fall Card by Samantha Mann
Grateful Fall Card
Are you inspired by this fun Autumn Card by Samantha? We hope you will try to use our Roundabout Stamp Sets to make background on your cards too!
To say hello to Sam and see more of her beautiful creations you can visit her over on her blog, Sam's Scrap Candy!

Thursday, November 11, 2021
Fall Blessings Card by Samantha Mann
Gorgeous Fall Blessings!
To say hello to Sam and see more of her amazing creations you can visit Sam over on her blog, Sam's Scrap Candy!
Tuesday, September 28, 2021
Fall Themed Card Duo by Farhana Sarker
A Fun Fall Duo!
Friday, September 10, 2021
Grateful for You Card by Farhana Sarker
Grateful for You!
Wednesday, October 28, 2020
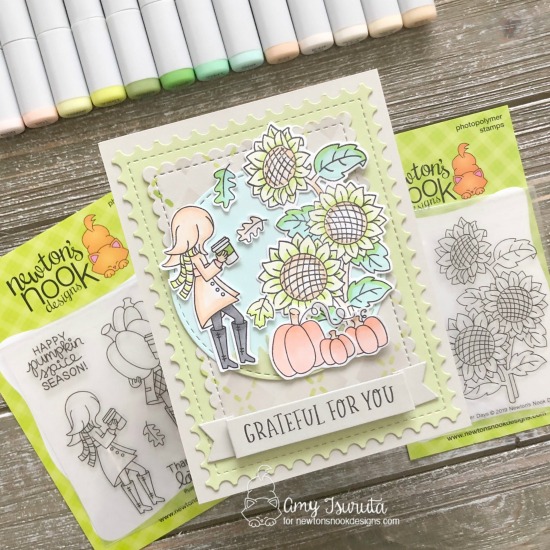
Grateful for You Card by Amy Tsuruta
Grateful for You!
Behind the circle, she added two fun layers with decorative edges that were cut out using our Framework Die Set. On the top layer she also added a soft argyle pattern using our Argyle Stencil Set. The finishing touch is the sentiment "Grateful for you" from our Fall Roundabout Stamp Set. It was added onto a banner that has a pop up dimension to it from our Banner Trio Die Set.
Monday, October 12, 2020
Fall Card Duo by October Guest Designer Farhana S

I made these cards using my favourite technique of copic coloring on kraft card stock. I will recommend using a brown copic friendly ink instead of the go to black ink for a better finish.

For the first card I used the Fall Roundabout Stamp Set, stamped twice off the two edges of an A2 piece of kraft paper. Then I colored in the images using copic markers, in fall colors. I stamped the sentiment form the same Fall Roundabout Stamp Set, using a brown ink and added a few sequins. To finish off the card, I trimmed it down, backed it with some matching pattern paper and adhered it to a A2 card base.

For the second card, I stamped the square image from the Fall Fringe Stamp Set at an angle and colored it in using copic markers. I stamped the sentiment in the center from the same set, trimmed it down, added some of the same pattern paper as the first card along with a few sequins before adhering it to a A2 card base.

I hope you are inspired by these no dies needed card! Fun fact way back when Newton’s Nook started, they didn’t have dies and I didn’t own a die cutting machine, so I used to do a LOT of fussy cutting!
Thanks for stopping by, hope you have a great week and see you back here next week! If you have any questions about these cards or need some inspiration for the Inky Paws Challenge please send me a message on Instagram, I’m @everydayengineered.
-Farhana
Wednesday, October 7, 2020
Grateful for You Card by Andrea Shell
Grateful for You!
Today we are sharing a gorgeous fall shaker card by Andrea! She created this awesome shaker by with the big round image of leaves from our Fall Roundabout Stamp Set. She embossed the image in white over that gorgeous fall colored background. Then she created a shaker window for it using our Circle Frames Die Set and filled it with irridescent sequins. so pretty!Monday, October 5, 2020
Fall Themed Gatefold Cards by October Guest Designer Farhana S.

Hi there! I'm Farhana and I've been crafting for almost 10 years now! It's always been paper crafts, transitioning from scrapbooking to cardmarking. Newton's Nook Design stamps were some of my firsts from back in 2013, so there are many retired sets in my stash. Inky Paws card challenge was also the first challenge that I ever did! After break, I have the time to enjoy them again!
I'm a huge fan of florals and pumpkins, so I am beyond excited to be the guest designer for one of my favourite brands! Thank you Jen and Samantha for making a dream come true!
Blog: Everyday Engineered
Instagram: everydayengineered

Happy Monday y’all! I’m so excited for today’s post as my dream to design for Newton’s Nook Designs has come true! I’ll be sharing every Monday in October, so please stop by to see what I have to share!
Today I’m sharing a pair of mini gatefold cards, I made using the Fall Fringe and Fall Roundabout Stamp Sets. The final card size is shy of 5 x 5 inches, but I said mini because the area to write a message is smaller than an A2 card.
I started by stamping both the images from the Fall Fringe and Fall Roundabout Stamp Sets on to heavyweight white cardstock with brown copic friendly ink. After coloring them (I used a ton of colors! I’ll list them at the end of the post!), I re-stamped the image using embossing ink, and heat embossed with gold (Remember not to move your stamp before embossing!). Then I die cut them using the Circle Frames and Frames Squares dies, and cut them in half with a paper trimmer.
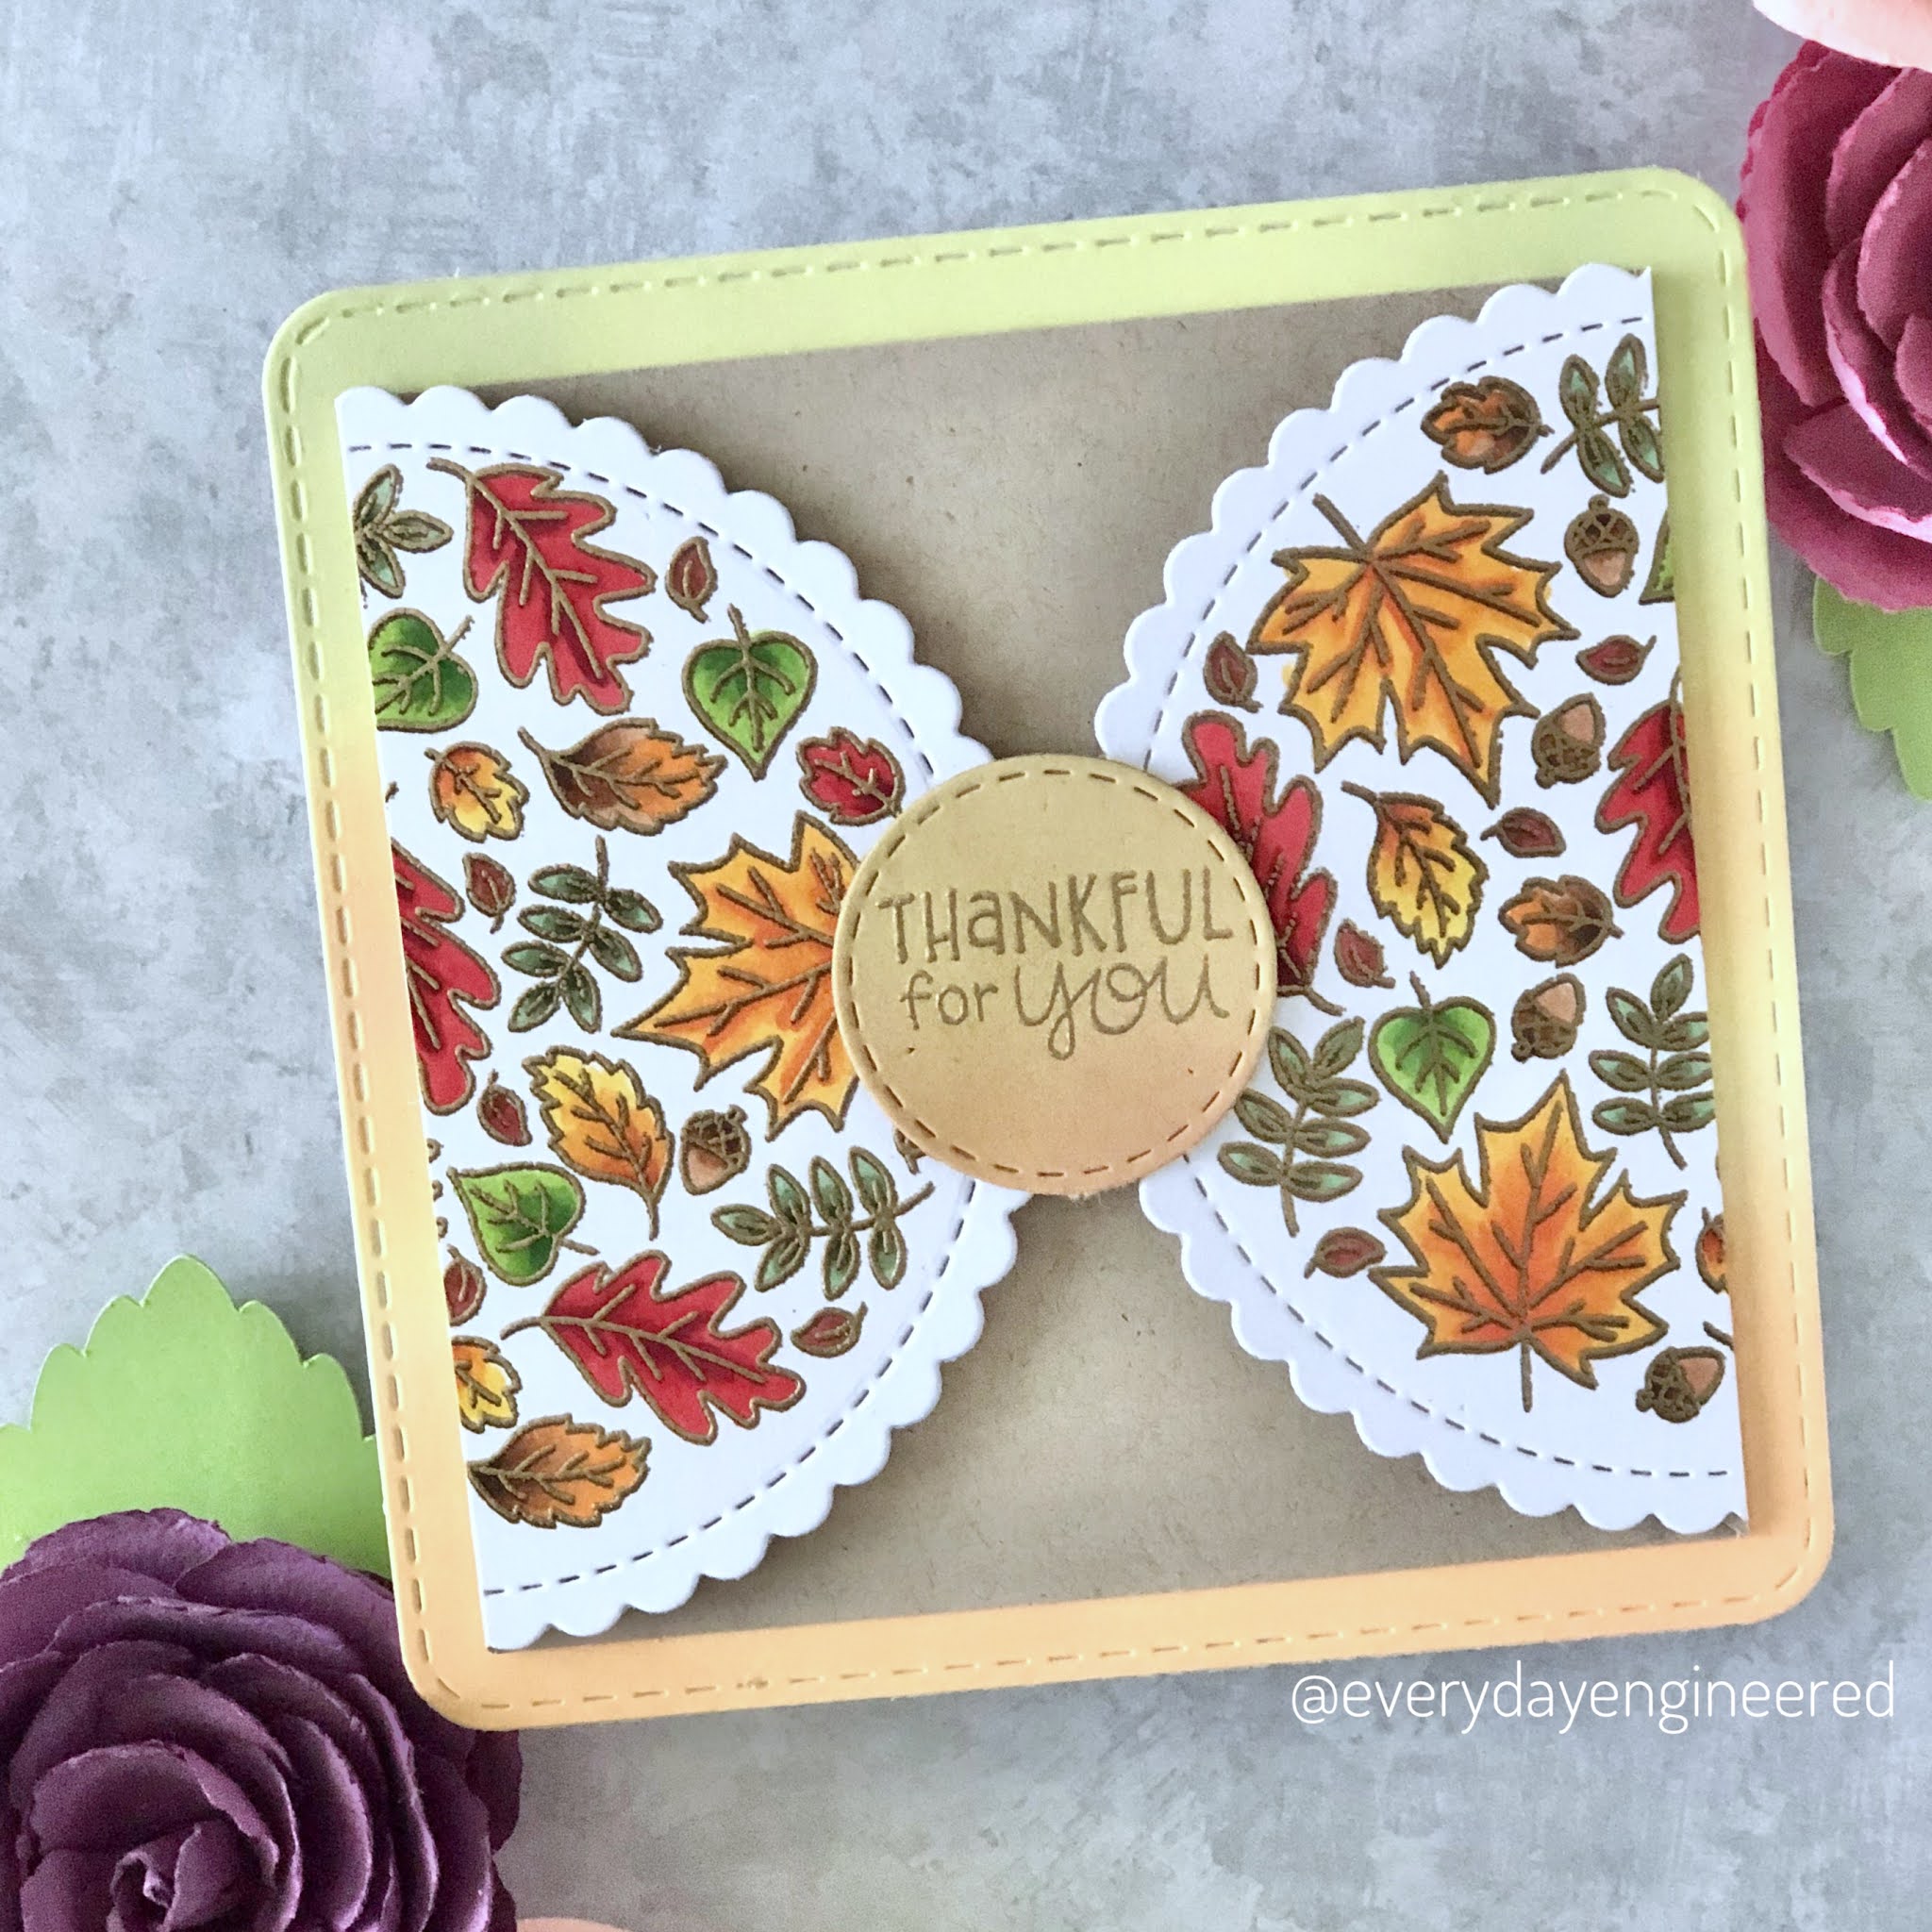
For the card base, I cut squares from the same heavyweight white cardstock and ink blended them lightly to match the colored images (I used scattered straw, dried marigold and shabby shutter distress oxide inks). Then I created the gatefold part of the card from 4 x 5 inch pieces of kraft card stock, scoring a half inch from each end. Lastly, before assembling the cards, I ink blended the same inks as the card base on to some scrap kraft cardstock, and embossed sentiments from the Fall Fringe Stamp Set, and cut them out using a smallest stitched circle from the Circle Frames Die Set dies.
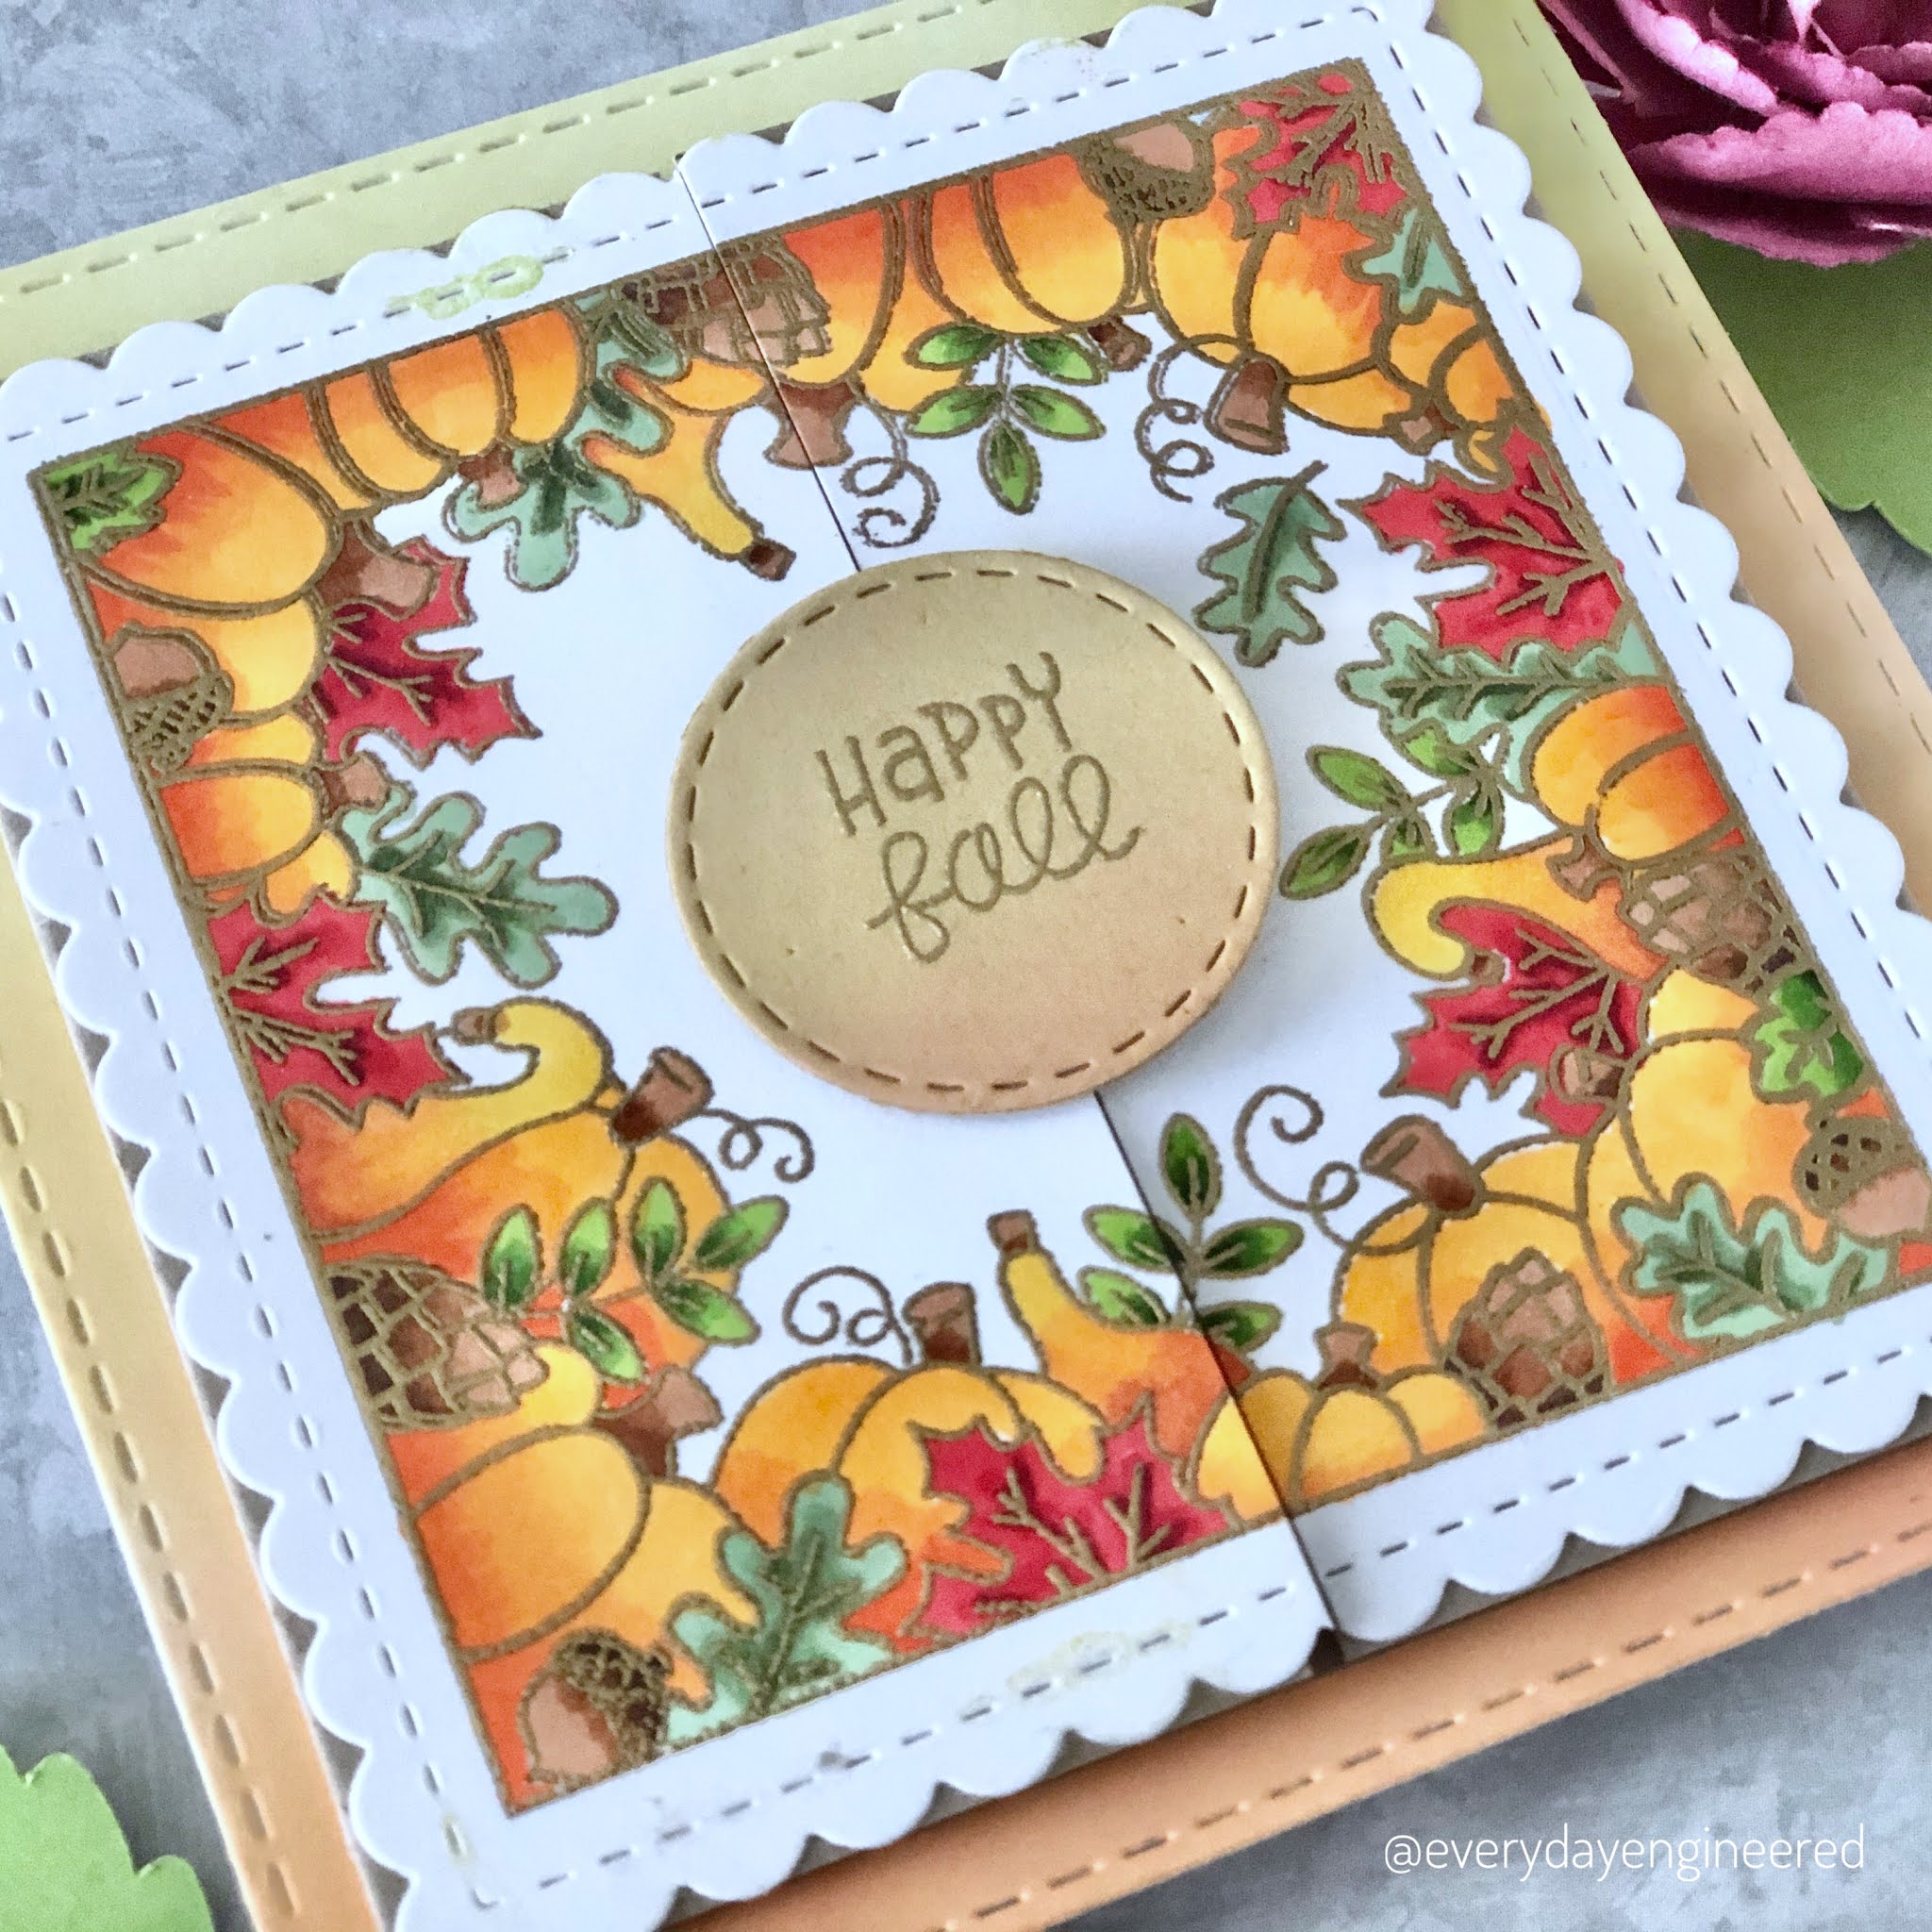
Now, we can finally assemble the card! I started by adhering the cut colored images to the shorter flaps of the kraft gatefold card using double sided tape. For the circle card, I flipped it, do the center of the circle was adhered to the creased edge. Using some more double sided tape I adhered the gatefold card to the ink blended card base. Lastly for the sentiment I used a little foam tape and placed it in the center of the flaps.
I hope all that made sense! If not please feel free to send me a message on Instagram and I’ll be happy to help you out! And don’t forget about the Inky Paws Challenge, here’s the first card I made (you can make up to 3 cards!)
And, lastly! Here are the copic combos that I used : YR07-04-Y17, YR18-15-Y15, R89-27-24, YG67-17-03, G99-94-21, E79-37-33-YR04.
Thanks for stopping by and I’ll see you next week!
Wednesday, September 30, 2020
Happy Fall Card by Amy Tsuruta
Happy Fall!
For the circle frame around the image she used our Circle Frames Die Set, adhering it with foam dimensionals to add more interest to the overall card design.
The sentiment "Happy Fall" is also from the Fall Roundabout Stamp Set and was stamped onto a banner from our Banner Trio Die Set. This tucks perfectly inside the circle!
Thursday, September 17, 2020
Grateful Fall Roundabout Card by Zsofia Molnar
Grateful Fall Card
Here is a close-up so you can see the lovely coloring and texture:
Tuesday, August 18, 2020
August Reveal - Day 2 - Paw-tumn Newton, Fall Roundabout, and Heartfelt Essentials
Paw-tumn Newton
- 3 x 4 photopolymer stamp set
- Includes 6 stamps: 5 images and 1 sentiment
- Coordinating Paw-tumn Newton purr-fect die set (sold separately) includes 5 dies
- Available for purchase in our online shop starting Friday, August 21st

Fall Roundabout
- 4 x 6 photopolymer stamp set
- Includes 6 stamps: 1 image and 5 sentiments
- Works with the Circle Frames and Banner Trio purr-fect die sets (shown above right, sold separately)
- Available for purchase in our online shop starting Friday, August 21st

Heartfelt Essentials
- 4 x 4 photopolymer stamp set
- Includes 111 sentiment stamps
- All the sentiments in this Stamp Set will fit inside the die cuts from our Banner Trio Die Set
- Available for purchase in our online shop starting Friday, August 21st

Get in the Mood for Fall Fun with our Design Team!
![]() |
| Amanda created a gorgeous fall shaker card today! She used two circle shapes from the Circle Frames Die Set to cut out the shaker frame. Inside the shaker the round image from our new Fall Roundabout Stamp Set fits perfectly! She added clusters of leaves on each side using die cuts from our Autumn Leaves Die Set. The "Give Thanks" sentiment was added onto a banner from our Banner Trio Die Set and the pattern in the background was added using the new Houndstooth Stencil. Such a perfect pairing of elements! |
![]() |
| Andrea created this delightful fall card featuring our new Paw-tumn Newton Stamp Set. She layered the image over three banners that were cut out using our Frames & Flags Die Set and a scalloped circle that was cut out using our Circle Frames Die Set. The background pattern created with our new Houndstooth Stencil adds the perfect bit of fall charm. |
![]() |
| This stunning square fall card was created by Ellen. She features the circle image of leaves from our new Fall Roundabout Stamp Set over the stenciled woodgrain circle from the Tree Rings Stencil. The image in the die cut scalloped circle from the Circle Frames Die Set fits perfectly! She also used our Banner Trio Die Set to hold the sentiment and our Frames Squared Die Set to cut out the rounded square. |
| Tatiana shows how watercoloring the image makes a simple and sweet fall card! She used the image of the kitty with his milk jug filled with sunflowers and pumpkins from the new Paw-tumn Newton Stamp Set with gorgeous watercolors. She added some leaves blowing in the breeze and the sentiment "Smile" from the new Heartfelt Essentials Stamp Set. The stitched rectangle background was cut out using our Frames & Flags Die Set. |
| Zsofia shows a fun way to use the large circle from the new Fall Roundabout Stamp Set on a square themed card! She stamped and colored the big circle image of leaves from the set twice and cut it out using the interior window cuts from our Slimline Frames & Windows Die Set. What a great way to expand the ways you can use this set. She uses the the Slimline Frames & Portholes Die Set to add the scalloped edge for the slimline card layout too. |
![]() |
| Samantha created this incredible fall card featuring the kitty from our new Paw-tumn Newton Stamp Set. She colored the image in gorgeous colors, adding a pop of teal to the milk jug. She also added in additional sunflowers behind the jug using our Sunflower Days Stamp Set. The card background filled with a gorgeous leaf pattern created with our Falling Leaves Stencil. |
![]() |
| Amy created this exquisite card featuring the leaf image from our new Fall Roundabout Stamp Set. Isn't the soft fall color palette she used so beautiful and unexpected? She also used our Circle Frames Die Set to cut out the image and the scalloped circle frame around it and our Banner Trio Die Set to hold the "Welcome Autumn" sentiment. |
![]() |
| The pop of teal mixed with fall colors on this card by Larissa is so cheerful! She used our the image of the kitty peeking around the fall sunflowers and milk jug from the new Paw-tumn Newton Stamp Set over a fun teal inked sky. She also added some grass to the scene using our Land Borders Die Set and framed the scene with a scalloped teal frame using our Frames & Flags Die Set. The sentiments on the card and envelope are added using our new Heartfelt Essentials Stamp Set. She also used the new Houndstooth Stencil to add some pattern to the envelope flap! |
| Maria created this spectacular fall greeting. She used the big circle of leaves from our new Fall Roundabout Stamp Set, stamping it in opposite corners and coloring it with a lovely fall color palette. She added die cut leaves to the center using our Autumn Leaves Die Set. the finishing touch is the sentiment, "Happy Fall" stamped onto a banner from our Banner Trio Die Set. So beautiful! |

We will choose ONE lucky winner for each stamp set!
Check out all the awesome Design Team Blogs below to enter:
Newton's Nook Designs
Ellen Haxelmans
Larissa Heskett
Samantha Mann
Zsofia Molnar
Maria Russell
Andrea Shell
Tatiana Trafimovich
Amy Tsuruta
Amanda Wilcox
.jpg)