It's time to make room for new products so we are retiring select designs!
These designs are discounted up to 40% off while supplies last so hurry to get your favorites before they're gone for good! Head over to the shop to see what's going away in the retiring sale category!
All week our design team will be sharing inspiration using some of their favorite products from our retiring list and we are featuring projects by Amanda and Tatiana!
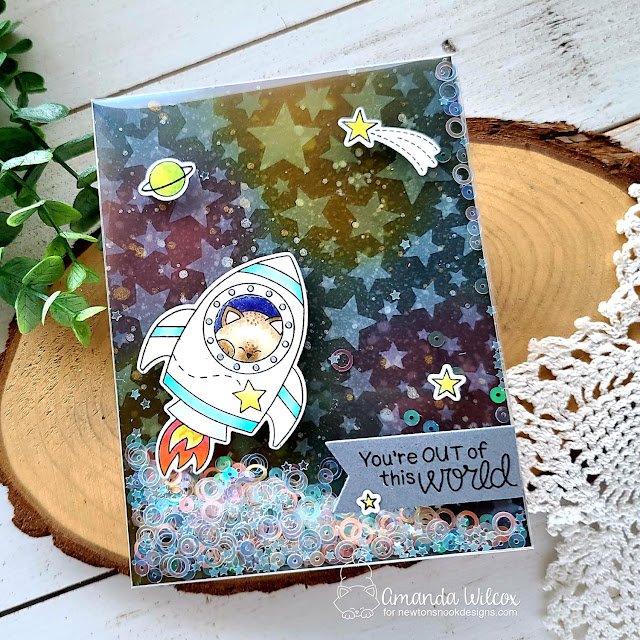
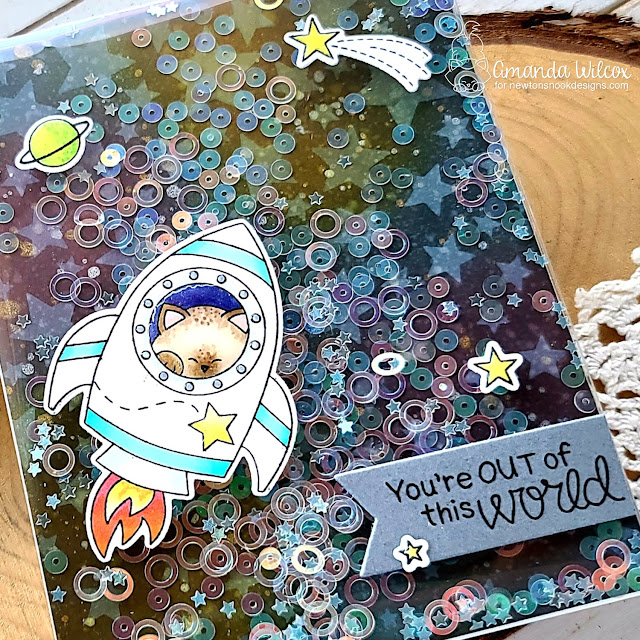
Amanda created a shaker card that is truly out of this world! She features Newton in his space rocket from the Cosmic Newton Stamp Set over a fun shaker background. The starry sky background was created with distress inks and ourCascading Stars Stencil. What a fun setting! Detailed product list below.
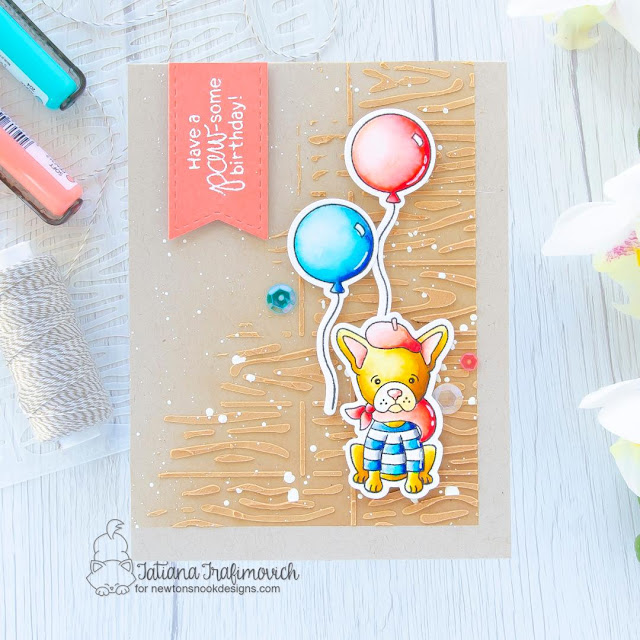
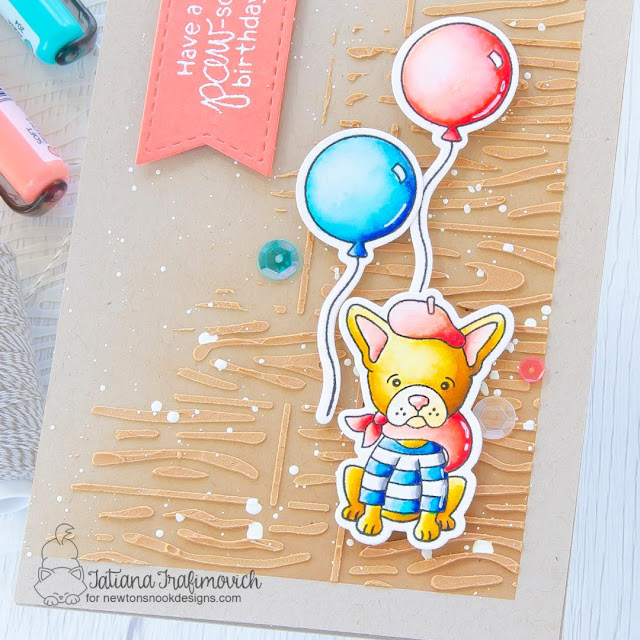
Send paw-some birthday wishes with this adorable puppy card! This card by Tatiana features the adorable french bulldog puppy and balloons from the Fabulous Frenchies Stamp Set. She layered the images over a woodgrain background that was adding using the retiring Hardwood Stencil for some fun texture.
note: This is our second post today, to see a fun card by our Guest Designer, Jennifer Ingle, scroll down or click here.
It's time to make room for new products so we are retiring select designs!
These designs are discounted up to 40% off while supplies last so hurry to get your favorites before they're gone for good! Head over to the shop to see what's going away in the retiring sale category!
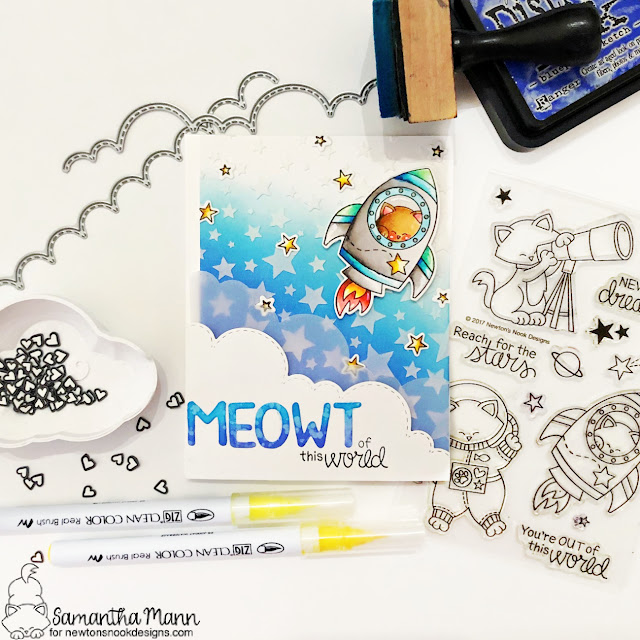
All week our design team will be sharing inspiration using some of their favorite products from our retiring list and we are starting the week out with projects today by Samantha and Maria!
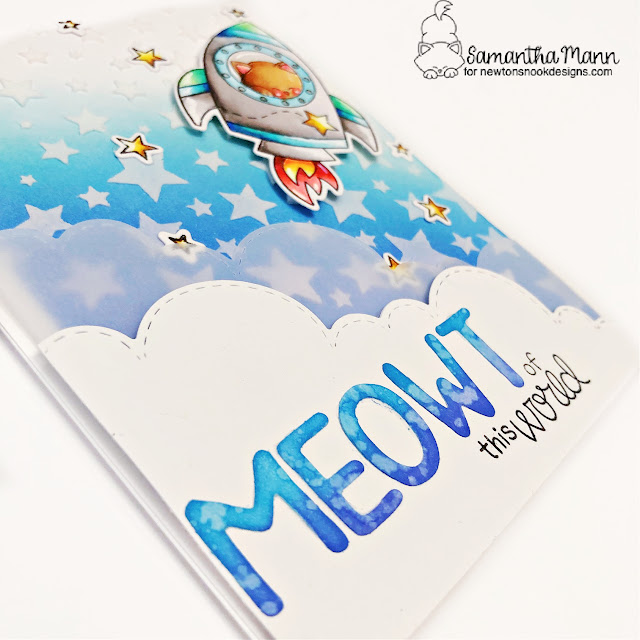
Newton is rocketing in to the sky in his spaceship on this adorable card. She added in a gorgeous starry sky using our Cascading Stars Stencil and layers of clouds with our Sky Borders Die Set. The custom sentiment "MEOWT of this world" was created by cutting out letters with our Essential Alphabet Die Set to pair with the sentiment from the Cosmic Newton Stamp Set. So fun and creative! Detailed product list below.
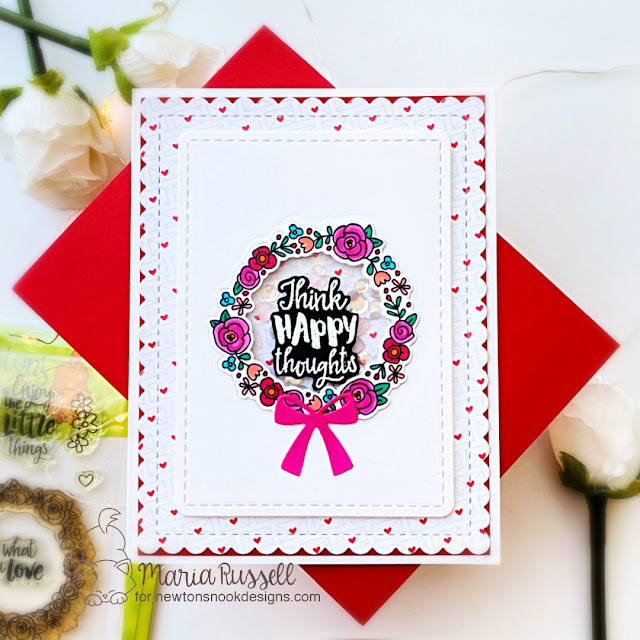
Maria created a fun shaker card, framing the shaker window with that beautiful floral wreath. She added in a bow on the bottom using our Baby Bibs Die Set. The background layers were die cut using our Frames & Flags Die Set with white cardstock and a patterned paper from our Love & Meows Paper Pad. Detailed product list below.
Blast off! Today Samantha created a fun birthday card that is sure to make you smile! She started out by stamping the image of Newton in a rocket ship from our Cosmic Newton Stamp Set and coloring in in vibrant colors! The image is cut out using the coordinating Cosmic Newton Die Set. She added it to her card over a gorgeous sky with shades of blue that was created using distress inks. She added stars to the sky, also from the Cosmic Newton Stamp Set. Then for a fun bit of whimsy, she added a trio of balloons that are being pulled behind the rocket! The balloons are from the Fabulous Frenchies Stamp Set and were cut out using the Fabulous Frenchies Die Set.
Isn't it cool how the colors on the balloons and spaceship have a rainbow effect? So gorgeous and unexpected! It would be so much fun to receive a birthday card like this in the mail!!
To say hello to Sam and see more of her amazing creations you can visit Sam over on her blog, Sam's Scrap Candy!
Today's card by Amanda is out of this world! She created a space themed card using our Cosmic Newton Stamp Set. On the front of her card she featured the image of Newton in a space rocket, heading out to explore space! She layered the image over a cloudy sky that was created using our Cloudy Sky Stencil. She added the sentiment "have a blast" using a banner from our Frames & Flags Die Set. She also die cut the bottom edge using our Sky Borders Die Set.
When you lift this panel up, a whole space scene and sky is revealed!
She created a wonderful galaxy background using distress inks and added shooting stars, planets and the kitty in the spacesuit from our Cosmic Newton Stamp Set. The images were cut out using our Cosmic Newton Die Set. She also added the sentiment onto a banner that was cut out using our Frames & Flags Die Set.
This card is so fun with the hidden scene reveal! What a fun surprise for the recipient!
Thank you, Amanda, for sharing this fun card idea with us today! To say hello to her and see more of her awesome creations you can visit Amanda over on her blog, Twiddler's Nook!
Hello Krafty Friends! I’m back as April’s Guest Designer for Newton’s Nook Designs. In this weeks card, Newton is looking through his telescope and sees a shooting star. I used the Cosmic Newton Stamp Set to make a cute slider card, I have many more ideas with this set in mind!
Working out the logistics of this slider card, was both exciting and a little frustrating. But…this months theme has been thinking outside of my box, I can’t get “outside” of my house, so I guess I should step outside of my box!
I started my project making my background. I wanted a pretty galaxy sky, I used Distress Oxide Inks to achieve my goal. I did make two large backgrounds so I could get four card panels out of them. On the first one I used Mustard Seed, Picked Raspberry, Squeezed Lemonade, Seedless Preserves, Twisted Citron, Salty Ocean, Mermaid Lagoon, Chipped Sapphire and Black Soot. I first laid down the bright inks, overlapping some to blend in secondary colors. Then I muted them down with Chipped Sapphire and Black Soot to create a nighttime effect. On my second panel I left off a few colors (Squeezed Lemonade, Seedless Preserves, Twisted Citron and Salty Ocean).
Once the layering of ink was complete I first sprayed the panels with water, to get the oxide reaction. Then I splattered some watered down white and yellow acrylic paints with a little liquid stardust.
On my second panel I also splatter liquid stardust directly, I loved the effect this gave…its sooo shimmery!
I then decided to cut my background from the largest die in Newton’s Framework set. Next was my challenge. I wanted to create a shooting star, and all the slider card dies I have in my stash were too wide, so I had to be creative and come up with my own template. My first attempt (the second is shown here) didn’t work exactly like I had wanted, so I tried again. This time I did use a slider die, but modified it and made it smaller on a white piece of cardstock. I also decided that a curve wasn’t going to work properly, because I couldn’t get it to slide smoothly. I made my template, then traced it onto my background panel, and used my pen blade to cut it out. Then I used foam tape, and a dime to make my shooting star slide. The dime for the weight, and the foam tape for dimension. I used a triple layer of foam tape all around the edges of the card and some in the middle for stability. This gave the space needed for the star to slide.
I stamped my images onto a copic friendly cardstock using Lawn Fawn’s Jet Black Ink. Then used the following Copic Markers for my palette:
Planets: RV04, RV06, RV09, V12, V15, Y06, B04, and B06.
Stars: Y06, Y08 and Y19.
Stardust: Y000, YR00, BG000, R00 and C00.
I went over the planets, lens of the telescope and the stars with a Wink of Stella clear glitter pen.
I cut grass from black cardstock and used Versamark Ink to stamp my sentiment “Reach for the Stars.” Then I heat embossed with Hero Arts white embossing powder. Next, I adhered all the elements to my card.
I was pleased with how this version of my card turned out, I hope you all enjoy it as well!
As I said above this was my second card, the card on the bottom of this picture was my first. I didn’t care for the sentiment in the sky, I thought it popped much better on the black grass. Plus, I wasn’t pleased with the way the slider was actually sliding. So, I went back to the drawing board and fixed the areas I wasn’t happy with. I’m so glad that I did, I really love my finished card now!
I've also created a video showing you how I created this card:
Don't forget to subscribe to the Newton's Nook Designs YouTube Channel to see more great videos!
Thanks so much to Newton’s Nook Designs for having me as their April’s Guest Designer (can you believe April is almost over)?! It was such a huge honor for me to be asked, I truly love their products! They have such a wonderful group of ladies to work with, I’ve enjoyed my time immensely!
This sweet hot air ballon card by Andrea is sure to uplift your day! She created this card using image of the kitty in the hot air balloon from our Newton Dreams of Paris Stamp Set. She colored the image in cheerful bright colors using copic markers. She cut the image out using the Newton Dreams of Paris Die Set. She added the image onto a wobbler before adding it to her card so that it sways back in forth in the sky! (scroll down to the end of this post to see a little video)
For the sky, she used our Clouds Stencil to create layers of clouds in different pastel colors! So pretty! She also used our Hills & Grass Stencil to ink a hill along the bottom and stamped the sentiment onto the hill from our Cosmic Newton Stamp Set. The whole background panel was cut out using the scallop edged die from our Frames & Flags Die Set.
Here's a quick little video clip so you can see the wobbler in action!
Thank you, Andrea, for the lifting us up today! To see more fun creations by Andrea, you can visit her over at her blog, Blissfully Scrappy too!
Today we are sharing a fun way to create a personalized birthday card by Tatiana! She started out by creating a whole bunch of colorful balloons in the background. She creatively used the top part of the die that goes with the balloon from our Fabulous Frenchies Die Set to create a quick stencil and then inked the colorful balloons using distress inks. Then she carefully used just the balloon string from the balloon stamp from our Fabulous Frenchies Stamp Set to stamp on the strings! So creative!
Then, for the big balloon in the center of the card she used the balloon die cut from our Balloon Shaker Die Set, inking it up with distress inks. She added the number 18 from the Essential Alphabet Die Set. She added the "it's your birthday" sentiment embossed on a piece of black cardstock using our Newton’s Birthday Bash Stamp Set. She also used the birthday hat from this set, placing it over the 8. The bow tie is from the Papa Bear Stamp Set and the star die cuts were cut out using the stars from the Cosmic Newton Die Set.
You could easily make this card for any age, just by changing the number! So creative!
To see more details on her projects today and more of her beautiful creations you can visit Tatiana at Tatiana Craft and Art.
This is our second post today! To see an adorable card by our Guest Designer, Milene Tiberious, scroll down or click here.
This week we are partnering with Xyron for a very awesome inspiration week! Each day we will have fresh inspiration using Newton's Nook Designs products with Xyron adhesives on the NND blog and Xyron will be featuring projects as well on the Xyron facebook page! There are prizes too! Read all the way to the end of this post to find out how you can win!
Today we are featuring projects by Jennifer and Samantha!
First up is the is this gorgeous card by Jennifer:
For her card, Jennifer used our Cameo Frame Die Set to create a gorgeous focal point. She cut the intricate frame out of a piece of glitter paper and used the 3" Sticker Maker from Xyron to make die cut piece into a sticker. Creating a sticker makes it so easy to attach an intricate piece like this to your card! She then added the "hello" sentiment and the lovely flowers stamping them from our Peony Blooms Stamp Set. Isn't that bloom so lovely on embossed in silver on vellum? She used the Peony Blooms Die Set to trim them out and layered them over the frame with some silver string. She mounted the whole piece onto a silver and white background panel.
Visit Jennifer's blog: Stampin' on the Fly to see more and leave a comment for another chance to win!
Next, we have a beautiful star-gazing card by Samantha:
For her card, Samantha used the image of the kitty looking out into the sky through a telescope from our Cosmic Newton Stamp Set. She colored the kitty and cut him out using the coordinating Cosmic Newton Die Set. For her card base she created some hills using our Land Borders Die Set and added some an awesome circle filled with stars that she created using our Starfield Stencil. She added some star stickers on the sky too. To create the stickers she stamped and die cut the little stars from the Cosmic Newton Stamp Set and then used the 1.5" Sticker Maker by Xyron to turn them into tiny stickers! So cool! She also used the Mega Runner by Xyron to put the card together!
Visit Sam's blog: Sam's Scrap Candy to see more and leave a comment for another chance to win!
Would you like to win a Prize pack including a Mega Runner from Xyron and a $25 store credit to Newton’s Nook Designs?
Here's how to win:Leave a comment on the NND & Design Team blog posts usingXyronproducts all week (June 25-29) to enter. One winner will be randomly chosen from blog posts throughout the week so the more posts you leave comments on the better your chances are of winning! You have until Friday June 29th at midnight EST to comment. The winner will be announced on the NND blog post on Monday, July 2nd.
Xyronwill also be giving away a prize pack! Make sure to visit the Xyron facebook page each day this week for inspiration and leave comments there for another chance to win!
Today we are sharing a fun and inspirational card by Samantha! For her card today she used that fun image of Newton in a space rocket from our Cosmic Newton Stamp Set. She colored the rocked in fabulous rainbow colors and added it to her card with a slider behind him so you can slide him up into the sky! How cool is that!? That fun black background was created using a paintbrush and some black gesso and then she added a bunch of the smaller stars and a planet, also from the Cosmic Newton Stamp Set. She cut out all the pieces using the coordinating Cosmic Newton Die Set. to finish off her card she added the "reach for the stars" sentiment embossed in white on a black flag and some rainbow washi tape up the right side. So fun! This card would be great to send to a graduate or just for fun to inspire someone to do their best!
Thank you Samantha for the inspirational card today! To say hello to Samantha and see more of her awesome creations, you can visit Samantha's Blog, Sam's Scrap Candy!
This is our second post today! To see an adorable card by our Guest Designer, Mindy Eggen, scroll down or click here.
This week Newton's Nook Designs and Therm O Web are partnering for a fabulous inspiration week! All week long both design teams will be sharing ways to add fun foils and more to your cards using Therm O Web products with Newton's Nook Designs stamps! There are prizes too! Read all the way to the end of this post to find out how you can win!
Today we are featuring projects by Juliana and Jennifer!
First up we are sharing two adorable cards with foiled backgrounds by Juliana:
For her first card Juliana created a beautiful foiled background of stars with our Cloudy Sky Stencil and Deco Foil by Therm O Web. She used the Deco Foil Transfer Gel from Therm O Web and a heat laminator to adhere the foil to the background. She also added various inks to the background in purple, blue, and black to create that night sky effect. She layered some vellum over the background and the image of Newton viewing the night sky with a telescope from our our Cosmic Newton Stamp Set. She colored the cute kitty image and trimmed it out with the coordinating Cosmic Newton Die Set to add onto her card. She also added in the "Never stop dreaming" sentiment from the Cosmic Newton Stamp Set on a white banner that was cut out using our Frames & Flags Die Set.
For her second card, Juliana used created a beautiful foiled background of clouds with our Cloudy Sky Stencil and Deco Foil by Therm O Web. She used the Deco Foil Transfer Gel from Therm O Web and a heat laminator to adhere the foil to the blue background. Then she layered a stitched white panel over it and added on that sweet image of Newton sharing his umbrella with a little duck from our Newton's Rainy Day Stamp Set. She colored the image in bright cheerful colors and cut it out using the coordinating Newton's Rainy Day Die Set before adding it to her card. She also added sentiments from the Newton's Rainy Day Stamp Set. So cute!
Visit Juliana's blog: 17 Turtles to see more and leave a comment for another chance to win!
Next we have an adorable space themed card by Jennifer:
Jennifer created and awesome background using Deco Foil by Therm O Web with our Starfield Stencil to create a wonderful shimmery background. She taped down the stencil using the new Purple Tape by Therm O Web and then used Deco Foil Transfer Gel and a heat laminator to adhere the foil.
To go perfectly with her starry background, she used that cute image of Newton in his space rocket from our Cosmic Newton Stamp Set. She embossed the image in silver and colored in in fun bright colors. Then she trimmed it out with the coordinating Cosmic Newton Die Set to add onto her card. She also added in the "you're out of the world" sentiment from the Cosmic Newton Stamp Set, embossed in silver on a black strip of paper.
Here is a video by Jennifer that shows you just how the foil and stencils work together:
Visit Jennifer's blog: stampin' on the fly to see more and leave a comment for another chance to win!
There are also more amazing projects today over on the Therm O Web blog so pop over there for more inspiration!
Would you like to win a Prize pack including a $25 store credit to Therm O Web AND a $25 store credit to Newton’s Nook Designs?
Here's how to win:
Here's how to win: Leave comments on the NND & Design Team blog posts using therm-o-web products all week (March 5-9) to enter. One winner will be randomly chosen from blog posts throughout the week so the more posts you leave comments on the better your chances are of winning! You have until Friday March 9th at midnight CST to comment. The winner will be announced on the NND blog post on Monday, March 12th.
Want another chance to win? Therm O Web will also be giving away a prize pack! Visit the Therm O Web blog each day this week for more inspiration and leave comments there for another chance to win!